I can see, I can seee it!

"In this Special Series, I document my experiences with CSL carbon bumpers.
In this entry, I partially test fit the 1:1 CSL carbon bumper replica and give a few installation tips, along with the hardware checklist."
-Matt
Removal notes.
All you need to do are to remove 2x 8mm bolts in the fender liners and a few bolts underneath the bumper.
Start pulling firmly - but not too much.
You will need to remove the wiper fluid lines that are clipped onto the top of the OEM bumper and the 2x plugs for the fog lights.
5 minutes and that bumper was off. My PY MY02 came with the Kevlar carrier as shown below, sitting on my engine. It doesn't fit.

Carrier Removal Notes.
The bumper carrier takes a bit more time to remove. You have 3x bolts per side that can be seen through holes and 2x others per side that bolt the aluminum bonded plate to the frame rails.
You do not need to remove the headlights!
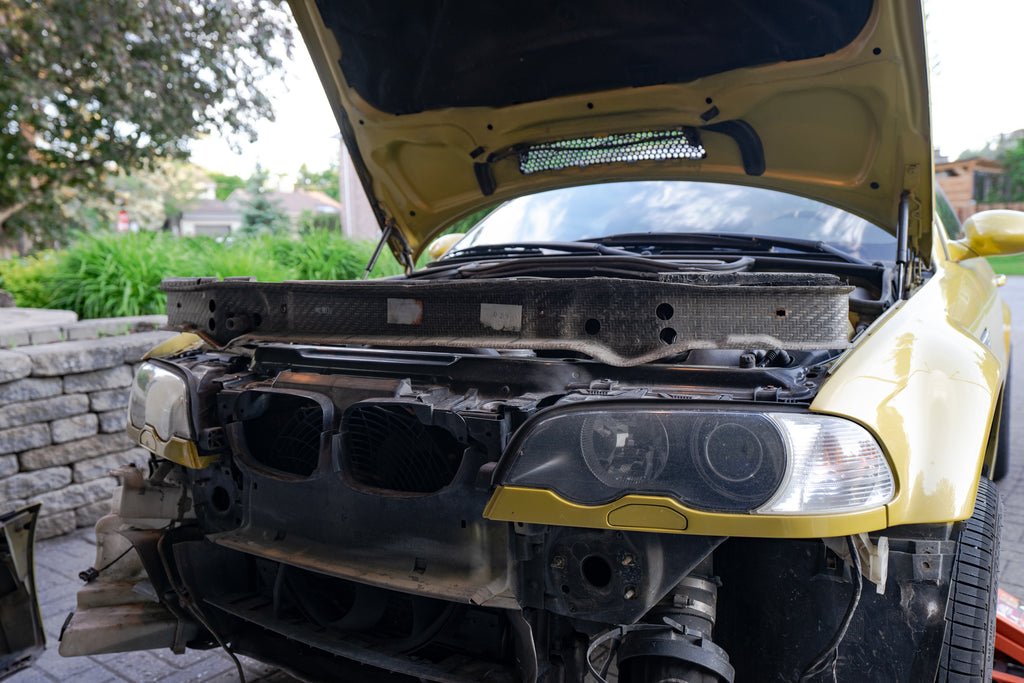
You don't need the full carrier.
A common misconception about fitting a CSL bumper is the requirement for the aluminum carrier. Similar to the "subframe" topic - what you need to change isn't actually the carrier itself, but rather its mounting system.
The kevlar carrier has aluminum plates bonded to it.

The original CSL bumper used the aluminum carrier's shock absorber. I ended up fitting the correct absorbers later on.

Hardware checklist.
Sourcing the CSL bumper and splitters is half the battle, getting the right mounting hardware and auxiliary parts was another challenge by itself.
I have split the checklist between the absolutely required parts to mount, and the highly recommended, yet optional parts. All parts are Genuine BMW.
Required*
- 2x Shock Absorbers
- 6x Hex Nuts
- 2x ASA bolts
*If you have an early generation E46 with the aluminum bumper carrier, you already have all of this.
Recommended
- Bumper grill
- Bumper gasket
- CSL snorkel ducting
- CSL snorkel ducting grill
- CSL windshield wiper fluid
You will also need to source the OEM CSL wiper fluid reservoir, or relocate it to the SMG bin. I chose the relocation option. I'll revert to this entry once the fitment is completed.
The Washer Fluid Dilemma.
From my research and feedback from previous OEM CSL owners: the washer fluid is different on the CSL and requires an updated, smaller version to fit a 1:1 CSL replica.
I'm still weighing my options: I can relocate the washer reservoir to the SMG reservoir location in the engine bay, or retain the OEM location and fit a smaller reservoir.
I'm also planning on deleting and shaving off the needless headlight washers later this Summer during body work.

Preliminary Fitment.
Back when I removed the OEM bumper, I didn't have the shock absorbers yet to complete my fitment. As such, I fitted the bumper by the corner chassis brackets without having the integrated carrier bolted - a lot of painter's tape was involved.
This is a worthless teaser for now. Still, the CSL bumper completely changes the front end aesthetics.

Up next: I complete my DIY fitment of the CSL bumper and widened fenders.
I will give my impressions before it's off to the complete restoration for the Winter.


