Satisfaction (Part I)

"In this Special Series, I document my experiences with CSL carbon bumpers.
In this entry, I complete my DIY fitment of the 1:1 CSL carbon bumper replica, review key fitment notes along with installation tips."
-Matt
TL:DR
My feelings about the fitment of the OEM+ CSL front end is translated in the title to this journal entry.
I am satisfied, it has OEM fitment potential.

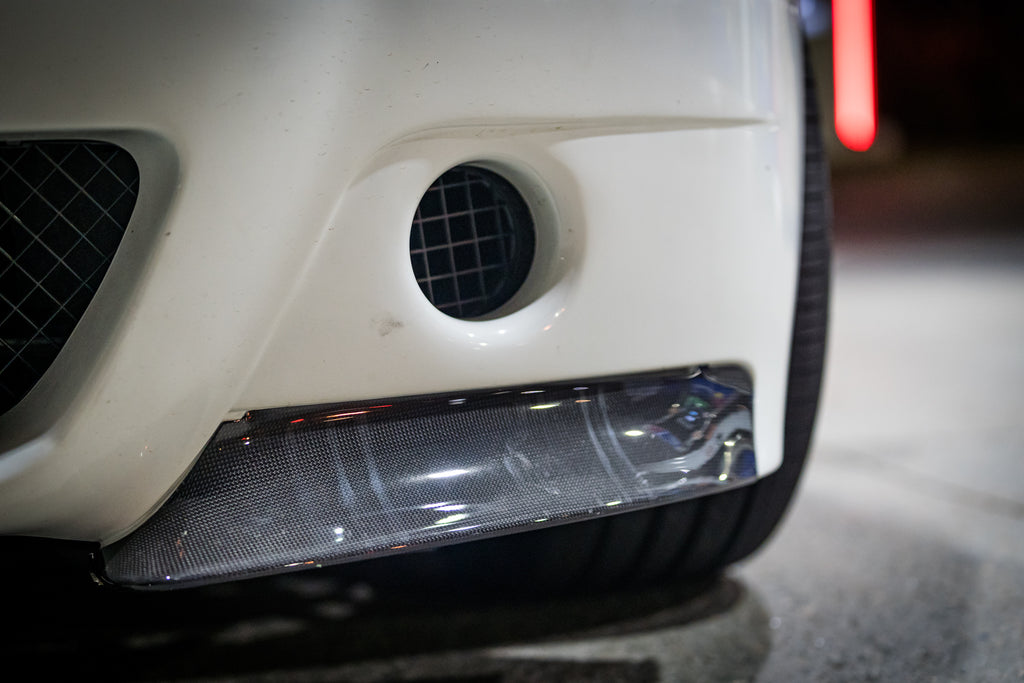
CSL Bumper fitment notes.
Panel gaps and misfitting aftermarket body panels trigger my OCD. I won't claim any accomplishments about getting OEM fitment with the bumper. It was my expectation considering the required restoration the car needed, and limited body skills!
No visual sag.
Most CSL replicas, and even the OEM bumper itself have a notorious sag by the middle of the bumper underneath the front grills.
I can't say I have noticed it here: the gaps are tight, and the bumper gasket seals the bumper to the lower headlights well.
When adjusting the side brackets to achieve an OEM bumper to fender fitment, it didn't add noticeable sag to the middle section either.

The carrier equation: solved.
I was initially confused by the molded, integrated carrier on this replica of the CSL bumper. I had purchased a complete aluminum carrier kit.
Ultimately, you don't need most of it. All you need are the shock absorbers and their mounting hardware to the chassis along with the 2x ASA bolts that hold the bumper to the shock absorbers. That's all there is to the carrier equation.
How to achieve proper corner fitment.
This is where you'll spend most of your bumper on / off & repeat cycles. Every car is different, and they're now pretty old. Luckily, the E46 M3 has somewhat easily adjustable brackets.
They are positioned by the headlights with slightly slotted holes with bolts and washers to allow for significant adjustments.
I was limited on time and focused on achieving a proper fitment by the driver side.

The bumper to fender gap is locked into position when bolting through the fender liners overlap into the integrated carrier of this CSL bumper.

The passenger side will be further tucked to the fender this Winter. There's plenty of adjustment still available on the corner bracket.

The grill & snorkel fitment.
The bumper center grill snapped into all tabs like OEM. The snorkel grill also snapped into the genuine snorkel ducting. The ducting itself has a flexible section that allows some play.
I recommended you fit the ducting to the snorkel and signature hole of the bumper before you bolt the bumper tightly. You'll otherwise have to start over as there's no play once fitted.
Don't mind the splitters, they're fixed with duct tape. The picture has exposure turned out, the grills are indeed black plastic.
Notes on misc.
Splitters.
I didn't really get to properly fit the splitters. My quick fit with duct tape leads me to believe there won't be any problems with these.
Undertray fitment.
Nothing to report here. The bumper is pre-drilled and the holes align well with the OEM undertray.
Tow hook cover.
You can re-use OEM without any fuss.
What remains to be finalized.
The horns.
The 2x OEM horns are mounted to the driver side kevlar bumper carrier with a metal bracket. This isn't re-used on and there is no visible way to mount these to the integrated carrier of this CSL bumper.
The wiper fluid reservoir.
As I covered in a previous journal entry, the CSL bumper requires the original CSL wiper fluid reservoir to be fitted if and only if you want to retain it within the bumper.
The CSL reservoir is stupidly priced at 330$ US. I opted to relocate the wiper fluid reservoir to the "drug bin". As I plan on shaving the headlight sprinklers, I didn't bother fitting this yet.
Up next: The Phoenix is off to paint & body restoration.
We'll revisit this next year once everything is painted and professionally fitted.


