We just wanted to be sure.

"In this Special Series about the E46 OE+ 1:1 Carbon Doors, I document the development, logistics of getting these doors to America. With the Atlantic bridged, I cover the unboxing, fitment adjustments, installation notes and final paint & body steps.
In this entry, I touch on expectations of OE+ versus Motorsport, and we finally test fit the carbon doors along with the widened carbon fenders.
I document the gaps, and body line alignments along with insights on how doors are aligned."
- Matt
It's a matter of expectations.
This set of 1:1 OE carbon doors were developed with the intentions to be an OE+ product. The essence is to purely improve upon the Genuine BMW. My expectations are OEM functionality, comfort for the street and a considerable weight loss.
They are not motorsport doors.
Upon publishing entries to this Special Series, a few European owners with these type of doors reached out to inquire about availability sharing feedback on Motorsport style carbon doors they had been using.
They have been available for the E92 and E46 for quite a while. They usually ditch the frameless BMW windows and are instead designed with a famed plexiglass along with an integrated door card.
As such, they let noises and vibrations in a lot more, they feel clanky and sound like a box of matches when you close the doors. For some, they had been a mod above their thresholds of tolerances to noise as they still use the car on the street.
Here's an example on the M3 V8. This is for serious track guys.

They should fit like OEM.
Over on the Stripper's Build Journal, I've been documenting positive experiences with test fitments on a new OE+ carbon trunk and widened & vented carbon fender kit.
Sometimes, aftermarket body panels may never come around to fitting right, such was my experience with a once popular fiberglass trunk. I went into test fitting the carbon doors with expectations that some adjustments would need to be required.
The V8's new carbon front end kit is absolutely mad, but it fits great - with some fiddling.

The E92's carbon doors have been sitting on a shelf since March. I decided to first fit them to the E46 M3's to get a feel for them - both during installation and whether they were liveable on the streets.

The test fitment.
The doors were previously readied for paint in various round of sanding and priming to bring them up to what we felt was an OEM level of flatness.
These being the first set of doors out of this commissioned mold, we wanted to do a final test fit before paint. The reasoning is, if you need to correct a door's lines and alignment after paint, your wallet will feel sorry for yourself.
I filmed and edited a reel with highlights of the test fitment here.
Still, fitting a door should be easier than trunks, and fenders: you only have 3x panel gaps to manage for, and one of them is lengthy straight line sitting at a large angle below the eye line - the side skirts!
We removed part of the paper that was shielding the inner doors from overspray to gain access to the door's studs. As a reminder, this is refurbished Genuine BMW hardware.

Doors are entirely held, fitted, and adjusted using the two hinges.

The top hinge will usually, freely move around with little force while the lower hinge, on both sides, required a pair of pliers sitting over a microfiber to avoid scratching the paint.

A job for pros.
No matter how simple I think it would be, I left it up to the pros. Pascal is the go-to guy for panel fitment. He's a positively annoying guy when you understand where he's coming from, and you need guys like him on this type of build.
Even though each door is 3.8 kg / 8.4 lbs, you need two sets of hands to fit these - and I highly recommend they be professionals.

Pascal gently bolted the doors to the hinges in an attempt to avoid damaging the paint.

You can notice paint marks to the left of the top bolt. This is a sign of the little adjustments to fit the doors.

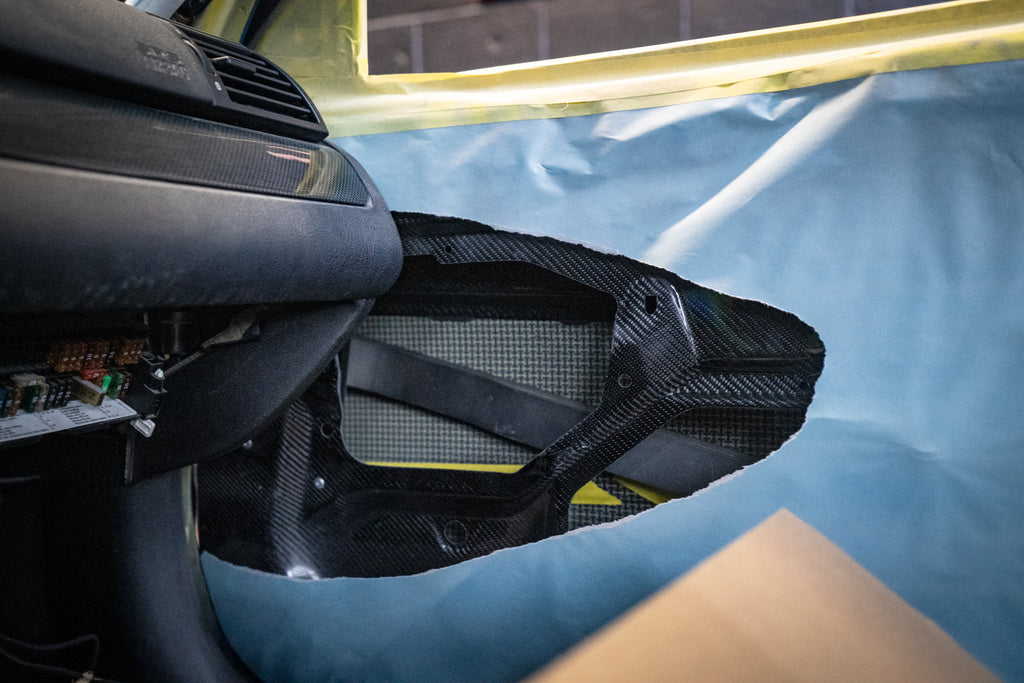
Seeing the exposed carbon sort of makes you want to do without the door cards - but it doesn't overcome my hatred of NVH.
Bam! With about 5 minutes worth of slight fiddling with the positions of studs of the hinges, we got to this fitment on the quarter-panel-to-door fitment.

The lines [...] align, perfectly. This was most relieving. The door trims used on the E46 are a signature component of its aesthetics. Anything wrong here would be very obvious.

But wait, there's more!
With one panel gap checked off, we needed to tackle the other important one: door-to-fender. We needed to properly fit the widened fenders to truly get a sense of its fitment.
We previously removed the loosely bolted widened carbon fenders to avoid any issues as we bolted the doors. Better be safe than sorry.
They were sitting on a rack - ready to go. I still can't get how how subtle the widening it.

We removed the underside's tape and paper we had put on to preserve the carbon's underside aesthetics.

The carbon fenders come in at 1.2kg / 2.6 lbs. Pascal reminded us those were excessively light.

Even yours truly could easily lift it up while holding a 15 lbs camera with the other hand.

Still, Pascal and Luigi fitted the fenders together. You don't want to drop your freshly painted fenders on the group due to a stupid mistake.

The fenders were a trickier test fit. Intuitively, you'll understand you have 3x the amount of bolts to fiddle with compared to doors.

They also have the bumper-hood-door-sideskirts-pillar-to-fender gaps to manage.

Still, it took Pascal 10 minutes to get to this level of fitment with Luigi's help. We didn't fully bolt down the fenders.

With the hands off, the upper section tilted to the right. Here's a reminder - and a tip to save time in your test fitments:
If you can achieve a specific panel gap fitment while holding the fenders, it will retain this gap when bolted.

Stepping back: AH! No matter the crappy lighting in this corner of the shop, you catch a glimpse of how the upper doors lines matches along the entire side and catches the widened fender arch.

But wait, there's another one!
Two doors means two molds. We reminded ourselves we preferred being safe than sorry and went about fitting the driver side door and fender combination for a thorough validation before paint.
The driver door was ready and waiting on another rack.

We also removed part of the underside's masking paper to gain access to the bolts. You can also see the foam used to ensure no paint would leak through the outer section during the upcoming spray session.

Imagine dropping your 3,000$ + set of carbon doors. Another pair of hand is always required.

The inner section of the doors are still in raw carbon. We will test fit door cards later on to determine what we'll do paint wise: raw, clear coated (gloss or matte?) or body colored.

We also fitted the widened fender on the driver side. There were no material differences in fitment - as such, I have no extra notes to share.

We did have to fiddle with alignment a bit more. Out of focus, tired, late PM - it was all human related, and not the doors themselves.

Still, Pascal pushes through even with the thoughts of this kids awaiting for him at school. High fives to all great dads out there.

For the purists amongst us, we did bolt the doors with 4x zinc plated nuts we had laying around. We will re-use Genuine BMW nuts body colored on the final assembly.

The lines [...] align!

De-risked.
Trust, and risks are fundamental requirements and obstacles to how I do what I do. De-risking these projects is part of the value I bring to M owners. Sometimes, it doesn't go according to plan. Up to now, this has.
These doors were commissioned 10 months ago to the tune of thousands of dollars, in an Eastern European country with a manufacturer whom I had never worked with before.
I feel confident enough in these doors to start taking orders for them here.

Finally, this was the final carbon panel test fitment.
Up next: It's time for the last round of paint on the restoration and color change.
We'll tackle interior accessories fitment.


